I’m beyond excited to share a simple and fun way to create your own DIY resin jewelry! In today’s tutorial, we’ll be making beautiful resin pendants, incorporating elements like sand, seashells, and dandelions to capture nature’s beauty in a unique and personal way.

A Special Way to Preserve Memories
Ever since Jon and I met, we’ve been collecting sand and dirt from our travels—deep red sand from our skydiving adventure, fine white sand from a retreat in Mexico, and even a bit of dirt from a luxury hotel in Seattle. These little souvenirs sit in tiny jars on our living room shelf, growing with every trip.
One day, I had a thought—why not turn these memories into jewelry? Instead of just admiring the sand in jars, I could carry a piece of each adventure with me. And so, this DIY resin jewelry project was born!

What You’ll Need
✔️ 8 oz of Casting Resin (Follow the kit’s instructions carefully!)
✔️ Pendant Jewelry Blanks (bonus: they’re on sale!)
✔️ Plastic Tablecloth (for easy cleanup)
✔️ Rubber Gloves (to keep your hands safe and clean)
✔️ Disposable Cups & Plastic Spoons (for mixing resin)
✔️ Q-tips (for cleaning excess resin)
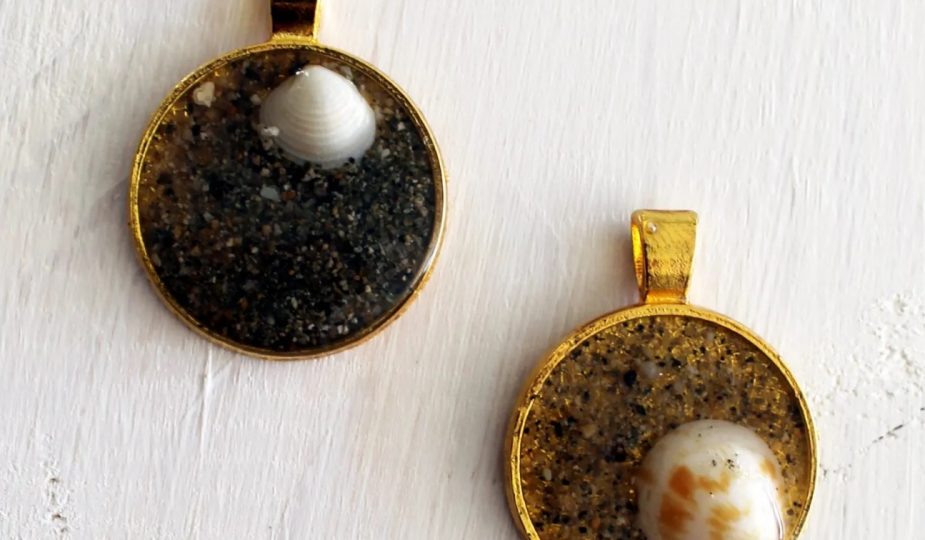
✔️ Sand, Shells, or Other Decorative Elements
How to Make DIY Resin Jewelry
Step 1: Prep Your Workspace
-
Cover your work area with a plastic tablecloth for easy cleanup.
-
Wear rubber gloves to protect your hands.
-
Use disposable cups and spoons to mix your resin—trust me, you don’t want to use your regular kitchenware!
Step 2: Mix the Resin
-
Read your resin kit instructions carefully and mix the two components exactly as directed.
-
Measure precisely—don’t “eyeball it”! Proper measurements ensure your resin hardens correctly.
Step 3: Add Decorative Elements
-
Place a thin layer of sand at the bottom of your pendant jewelry blank.
-
Gently add a tiny seashell, dandelion, or other decorative items to create a unique design.
Step 4: Pour the Resin
-
Slowly pour just enough resin to cover the contents of the pendant.
-
If resin spills over, wipe off the excess with a Q-tip before it dries.
Step 5: Let It Dry
-
Place the pendant on a flat surface (like the edge of the resin box) to prevent uneven drying.
-
Allow it to dry completely before handling.
Endless Creative Possibilities
Once you get comfortable with resin, the creative options are endless! We’ve started incorporating dandelions, printed images, and even kids’ sketches into our resin jewelry. It’s an incredible way to preserve memories, nature, and sentimental keepsakes in a wearable piece of art.
💬 What would you put inside your resin jewelry? Let me know in the comments! And if you try this DIY, be sure to share your creations—I’d love to see them!
Happy crafting! ✨